Today is the first of many to come.

I have been inspired by a customer, friend and now co-worker… This lady has been truly a push, shove and motivator of Home a la mode, lately… She has talked me into getting on the stick and updating many things.  It’s like playing Solitar… you are just trying to get to the finish… But the person standing over your shoulder is looking for what you are missing… So… Sue has been looking over my shoulder and pushing me to click on things that I have neglected for a while… like the BLOG for ONE…  So here goes…

8b993-005

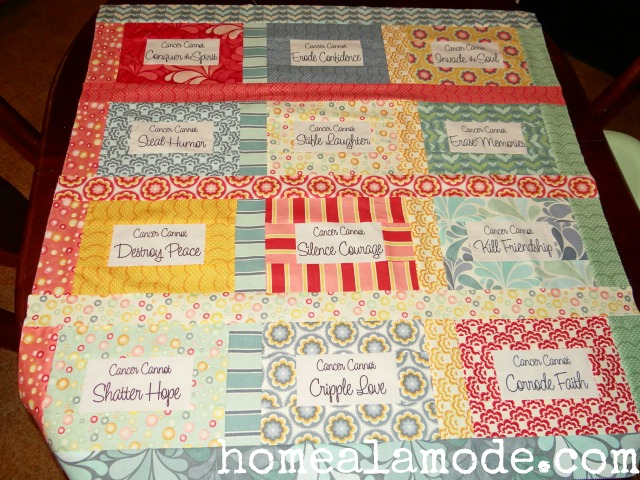
We have over 50 different “Say it With WORDS” panels and are making classes and quilting projects using these words to make “A Card In A Quilt”.  Our classes for these quilts usually are on Monday’s when our shop is closed, kinda… 🙂  our shop is open Tuesday – Saturday 10-5… but classes and free sewing time is Monday – Saturday 9-6… We have a 6 hr. class that is from 9-4 that is scheduled on Mondays… So, call us and set up your class… It’s $50 and includes a lunch!  The supplies are extra… depending on your size you wish to complete. We have several ladies that can let you know the value of our classes and all the neat things you learn and take home with you.  Come join us!  We are looking for a year full of new techniques and new friends!

3a738-009

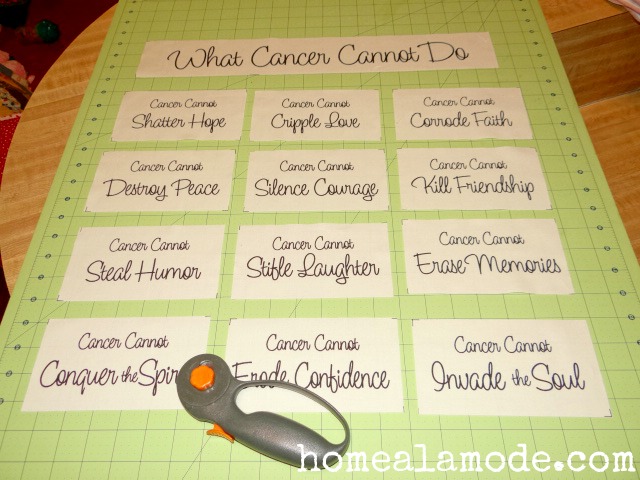
We teach you from beginning to end… How to choose your fabrics, how to cut with the Rotary cutter and supplies, how to build your quilt, layer it with batting, quilt it yourself, and how to bind and finish your project!  No PIGS in our classes… Oh, sorry, that means… Projects in Grocery Sacks…  So, we will take you through completion before, during and after your class… We want you to succeed in a completed project!

cef2f-dscn1221

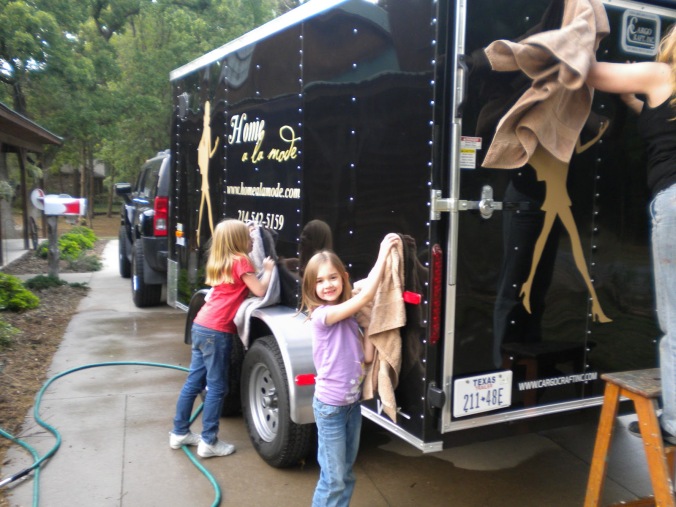
After all… these girls have grown up helping Granny out with the Home a la mode business.  We do shows every month, 2-3 times per month… So if we don’t catch you at one of the shows we do… we hope to see you shopping in the store… at a RETREAT… ONLINE.. or wherever our paths cross.  See you soon!  Karen, Brenda, Mistey, Patsy, Betsy, Sue, Marian, Judy, and others… Make it a GREAT day! 


Welcome to our shop in Beautiful Downtown DENISON Texas… Located at 611 W Main Street… find our house amongst the large buildings.   We carry all the Moda fabrics, precuts, frivols, notions, lots of yardage and a whole lot more!  This lady below is Brenda… one of the Home a la mode ladies, here to help you with your fabric and gift needs.  Classes  are ongoing.  Our classes are taught by several… Mistey Jones teaches a 12 week class for making a sampler quilt… Also, a disappearing 9 patch, as well as several other classes.  Elsie Russell is ready to teach us painting classes… Let us know your wants and needs for this class.  Also, Brenda McKinnon is ready to teach us basket weaving.  I, teach several classes for beginners and quilters wanting to know different techniques.  I am the “Word Girl” and the Fusible Queen… We like our flannel class called “Flannel Tonight” and our “1-2-3” class, as well as several other classes.  Stay tuned for our Class and Show event calendar postings.  Working on it. 🙂  Thanks for your patience!  Karen

DSC_0555
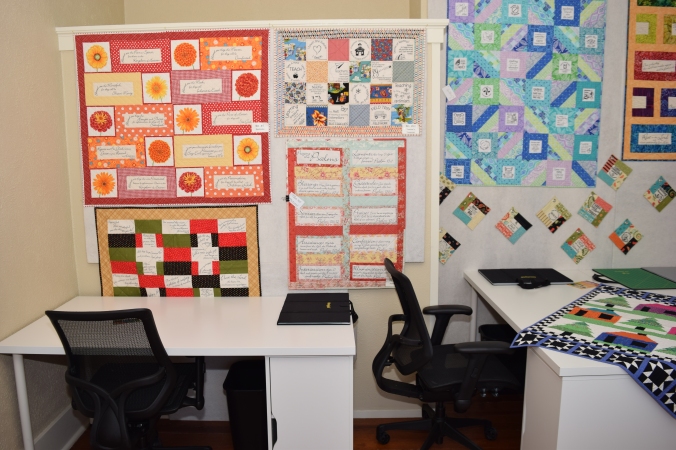
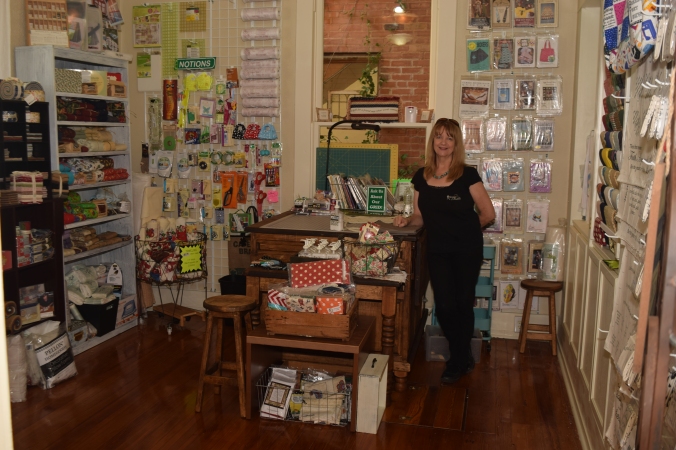
This is just one of our areas to do a classroom… do you have a teacher or project in mind?  Come visit us soon!  We also have a unique gift shop!  Lots of state towels, tablecloths, vintage kitchen and WORD Pillows as well as our REPURPOSED purses made from tents, tarps, canvas and army surplus… All.. one of a kind!!!  Get yours for Christmas!!!DSC_0566

A Virtual Tour of our New Store and Retreat Place

house-pictureThanks to all our wonderful friends and customers who came out to the Grand Opening of Home a la mode and The Retreat Place!  Here’s a bunch of pictures for those of you who were unable to make it.

Here is Karen, doing the Official Ribbon Cutting ceremony.  The city of Denison said it was the biggest turnout ever – we were very excited.DSC_0665We even had some adorable help with our Door Prize drawings.  DSC_0673

Looking for that perfect spot for your next retreat (or even just a girls weekend)?  Here’s a few pictures of our beautiful bedrooms with attached bathrooms.  We can sleep up to 12 people.DSC_0601 DSC_0600 DSC_0597 DSC_0576 DSC_0604 DSC_0548Here are a few pictures of our classrooms.  Each person will have their own desk and comfy chair.  There is a ton of design wall space and a light board with a view.  Stay tuned for our class schedule!DSC_0564 DSC_0546 DSC_0609And don’t forget, our fully stocked Quilt Shop.  It’s the perfect place to find all your quilting needs.DSC_0555 DSC_0506 DSC_0503 DSC_0498We’ve also set up our Vintage Kitchen Shop and Gift Boutique – this is a great place to find that gift for the person who has everything.  We have something for everyone.DSC_0479 DSC_0484  DSC_0529This adorable house was originally built as the first hospital in Denison.  We even have some pictures of it in its original form – we love all the history that this house holds.DSC_0541And don’t forget to stop by and enjoy a fresh cup of coffee or latte 🙂DSC_0539And here’s a few more pictures to complete your tour!DSC_0711 DSC_0473 DSC_0589Come by and visit us at 611 West Main Street, Denison, Texas.  Our Hours of Operation are Tuesday-Saturday from 10:00 am – 5:00 pm.  You can also go to www.theplaceco.com to book your next retreat or meeting.DSC_0455-editedWe hope to see you soon!

Come to our GRAND OPENING!

We’ve decided to open a Quilt Shop.  And what Quilt Shop is complete without a place to do the quilting?  That’s why we are also opening a Retreat House – it’s a great place to come and gather with friends to share your love of quilting and crafting.Grand-Opening-2015

Please join us at our GRAND OPENING – it will be a fun day full of amazing Door Prizes!

house-pictureCan’t wait to see you!

Frivols #2 is HERE!

Polka Dots & Paisleys are here!  Frivols #2 by Moda is in stock and ready for immediate shipment.CT-Frivol-2-Faithful-Close-UpFaithful.  From the beginning, we wanted this quilt to feature the signature cream, red and blue color palette of Polly Minick & Laurie Simpson. We also wanted it to reflect Laurie’s style of quilt – a lot of pieces and very scrappy.

The name of the quilt comes from Polly and Laurie’s family – if you didn’t know, they’re sisters.  Polly’s oldest son, Jim Minick, served in the Marine Corps and retired as a Colonel.  Semper Fi – semper fidelis – always faithful.  It just seemed right.  (Jim now the Director of Football Operations for the University of Michigan in Ann Arbor.  Go Blue!)

The squares included in the kit are enough to make the Faithful quilt top – no additional fabric is required except for the binding and backing.  Faithful measures 26″ x 26″.

Several fabrics are duplicated in the Frivol roll, as many as three squares of a few of the background fabrics are included.  That allowed us to keep the limited color palette while still allowing the quilt to be made with just the 7″ x 7″ squares.CT-Frivol-2-Contents

This is ONE of 12 Frivols

#1 and #2 are now available… Get yours now… VERY Limited quantities.  $44.99 per kit – buy 1 or buy all 12 collectors sets.


Quilter’s Tote Bag – Tutorial

Ask and you shall receive.  Many of you feel in love with our “Quilter’s Think” tote bag.  Here is the tutorial so you can make one for yourself.

Supplies:

Steps:

  1. Iron panel flat and cut out according to the lines.  You will end up with (12) 3.5″ squares.totebag1
  2. Cut (12) 3/5″ squares of each of the polka dot fabrics. totebag2
  3. Iron onto piece of grid in the pattern shown in the picture.  (I ironed both sides of the bag at the same time and will trim it after sewing.)totebag3
  4. Flip and sew each row, leaving the middle seam unsewn for trimming.  (Check out our video HERE to see how to use the Quilter’s Grid).
  5. Cut down the middle, unsewn seam to separate into 2 equal pieces. totebag4
  6. Measure across the middle of each piece to determine the size of top and bottom borders.totebag5 totebag6
  7. Cut (4) 4″ wide strips by the width of the main piece.  If you are going to add the accent strip, you will want to cut (4) 1.5″ strips the width of the main piece as well.totebag7
  8. Fold accent piece in half and iron.totebag8
  9. You will now sandwich the accent piece, the 4″ border strip, and the main piece together, with right sides together and raw edges towards the seam.  The Wonder Clips are great for this step – NO PINS NEEDED 🙂totebag9
  10. Sew and iron with the accent piece facing the desired direction.totebag10
  11. Repeat for 3 other seams.
  12. Measure you main body pieces and cut (2) squares of Soft & Stable to match.  I used Basting Spray to attach the stabilizer to the main body piece.  You can now quilt these pieces or just leave the way they are.  I just ran a straight stitch across the seam of the border pieces.totebag12
  13. Cut out (2) 4″ x the height of the main body piece & stabilizer.  Spray bast these pieces.totebag13
  14. Cut out (1) 4″ x the width of the main body piece & stabilizer for the bottom of the bag.  Spray bast this piece.
  15. Sew the 2 side pieces to the main body pieces to create the body of the bag.  Then carefully sew the bottom piece, making sure you get the corners attached.totebag14 totebag16
  16. Cut out (2) pieces of the Pink Polka Dot fabric to the same size of the main body pieces.
  17. Cut out (2) 4″ x the height of the main body piece.
  18. Cut out (1) 4″ x the width of the main body piece.
  19. Cut out  (1) 10″ x 12″ piece.  Fold, right sides together, to create a 6″ x 10″ rectangle – press flat.  Sew 3 open sides, leaving a small gap for turning.
  20. Turn right side out and press.
  21. Line up the pocket about 4″ from the top of the bag liner piece and centered, making sure the gap for turning is at the bottom.totebag17
  22. Sew on the pocket on 3 sides, leaving the top open.  You can also add an additional seam in the middle of the pocket from top to bottom to create a double pocket.totebag18
  23. Sew all liner pieces together to create the bag lining.
  24. Insert liner into main body, matching seams.  Sew a small hem to keep the liner in place.totebag19
  25. Create a “binding” for the top of the bag by cutting a 2″ strip and ironing it to create a double folded strip.
  26. Using the Wonder Clips, attach. the binding to the top of the bag.  Machine stitch this on, covering all raw edges.totebag20
  27. Once done, you will hand stitch the leather handles on.finished bag
  28. The last step is to show off your beautiful new bag to your friends 🙂finished bag2

I hope you enjoyed this tutorial.  I’m still new to writing directions, so please let me know if you have any questions or suggestions for future tutorials.

~Happy Sewing!

Our Beatitudes Panel and a Great Friend

We recently got a chance to visit with one of our amazing customers at a quilt show.  She mentioned that she had bought one of our panels to make a quilt for a friend.  Here is the story:

When I saw it, I immediately thought of my friend Deb.  We’ve know each other since 9th grade – I say that’s since God invented dirt, but Deb claims it’s since the beginning of all time.  We are both blessed with brothers, so we also recognize one another as the sisters we should have had.  Yes, it’s that kind of friendship/kinship/sisterhood.  

A few years ago, Deb went with me to the Dallas Quilt Show, which is when I bought fat quarters that weren’t in my normal favorites range for colors or prints.  Don’t know why I bought them, but I figured there was reason, so I put them aside until the reason presented itself… scrap-logic all quilters understand.  And, lo and behold, the reason presented itself when I saw the Beatitudes panel last summer at the Plano Quilt Show.  

The fat quarters, the Beatitudes, the randomness/precision design… it all came together in a single weekend to make a Blessing cover for Deb.   And the name of the Quilt?  “Friendship is a Blessing”.  

Here’s hoping my story brightens your day, Sarah.

Take a look at this beautiful quilt – and may it inspire you to make something lovely for a friend or loved one this weekend.
Happy Sewing ~Jill

Kaylin the Amazing!

I have an awesome in-law family (as you might know, Karen is my mother-in-law and partner in crime).  I’m married to the oldest of her 4 children, and 3 of them all decided to get married in a 5 month time frame.  Because of that, naturally we all had children together – there are 14 of them ranging from almost 13 down to 3-1/2.  Christmas time with all these kiddos are super fun and crazy.  Because of the number, we all draw names so each kid buys for one of their cousins.

Long story short, this year my oldest picked Kaylin, one of my adorable 4 year old nieces.  She has always been a kid who knows what she wants and isn’t afraid to tell you.  So I decided to ask her what she would like me to make her.  She very specifically told me she wanted a pink and purple cape with a heart on with a “K”.

So, I found a great (and easy) tutorial on Pinterest and got to work.  I dug through my stash of Moda fabric and found the perfect pink and purple combo, along with a cute printed fabric.

Her nickname is “Bird” so we decided to use a decorative bird stitch to finish off the edge.

This project also allowed me to play with my new embroidery machine, so it was a double win for me!

~Happy Sewing!

Customer Testimonial – She loves us!

We received the sweetest email the other day from a great customer.  She met us at a quilt show not long ago, watched Karen’s demo, and went right home and put her new knowledge and products to work.

I received the ultra weft! I just want to tell you thanks for the easier way to put my quilt together with spray and pvc pipe! I actually put my california king quilt together that I had been procrastinating about cause I just couldn’t bring myself to deal with all those pins and the hassle of trying to sandwich batting, backing and top on my small table in the mobile home I live in. AND the taping techniques for the quilting worked so much better. So my quilt is done waiting for the binding but that’s not a problem. So thanks, thanks thanks!!! 

I have my t-shirt quilt top put together waiting on the perfect backing for the theme. the color palate is not the best arranged but I wanted them in chronological order of the places I worked at while a traveling Occupational Therapist.  thanks again for simplifying my life with quilting and allowing me to actually finish (or almost finish) 2 of the most important quilts I will probably complete.   ~Linda

We wanted to share her sweet words, along with the beautiful quilts that she has made!

Show us what you’ve made with our products and we will feature you too 🙂
~Happy Sewing!